Document Properties
Originally published on 04 January 2019
When creating my website, I wanted to include a favicon which would appear in my browser's tab. While not technically required, I think it's a nice touch that allows you to set your site apart and lets it stand out amongst the many URLs that I have bookmarked.
There are many sites that allow you to create a favicon online (just search for "favicon generator") but I wanted to see if I could create one myself, locally on my machine. My first attempt was to use GIMP but the resulting icon, which I essentially "painted" in manually on a 16 by 16 pixel canvas, left much to be desired, even though I was just trying to draw the letter "S". Upon further research, it became evident that this was more due to my not understanding what GIMP is really for rather than any inherent limitation in the application itself1.
That is how I ended up using Inkscape instead. Like GIMP, Inkscape is an open source application that gives proprietary alternatives like Illustrator a serious run for their money. Unlike GIMP, however, which is a raster graphics editor, Inkscape is what is called a vector graphics editor. Vector graphics store their image data as a series of coordinates connected by a series of lines to render an image. They look sharper when scaled or magnified, such as when you zoom in on Google Maps. This post will document how I used Inkscape to create the favicon for my site.
To get started, launch Inkscape and create a new image.
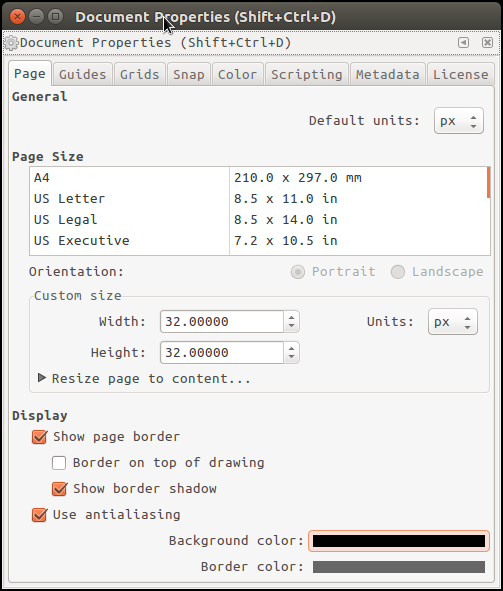
Edit the document properties by following File > Document Properties ... or by pressing Shift+Ctrl+D. Within the Document Properties window (Page tab), select a Custom size for your drawing by setting the Width and Height to 32 and selecting px for the Units.
Document Properties
Then click on Background color. To change the background color to black, set the R (red), G (green) and B (blue) values to 0 and A (alpha / opacity) to 255.
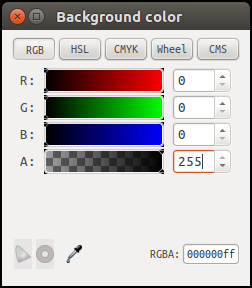
Background Color
Zoom into the document by following View > Zoom > Page or by pressing 5. Enable the icon preview by following View > Icon Preview....
To use a character as your favicon, select the text text icon ![]() in the toolbar (or press
in the toolbar (or press F8), click on your document and enter your letter. At this point, you have have to make a number of adjustments to it so select your object using the select object icon  .
.
Once selected, follow Object > Fill and Stroke... or press Shift+Ctrl+F to go to the Fill and Stroke pallet on the right. Change the R (red), G (green) and B (blue) values for Fill to 255 and A (alpha / opacity) to 255 as well.
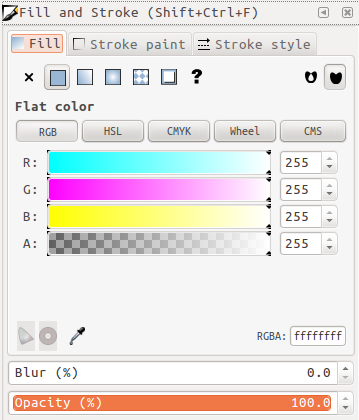
Fill
Click the Stroke paint tab and do the same thing. This will make the character's fill and outline both white.
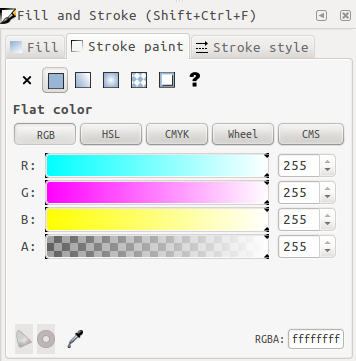
Stroke
If you want to change the font, follow Text > Text and Font... or press Shift+Ctrl+T and select the desired font.
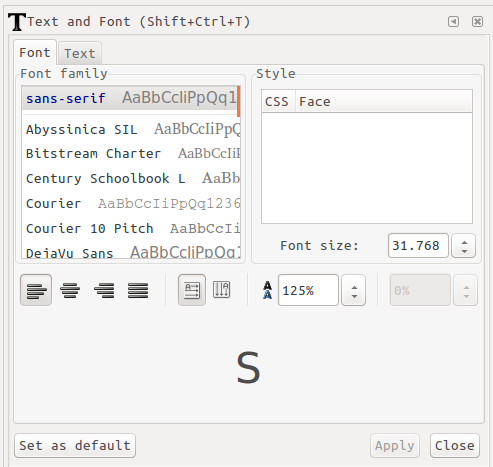
Font
To scale the letter so that it fits within the 32x32 pixel area, follow Object > Transform... or press Shift+Ctrl+M. (Make sure the object is still selected.) If the letter is too big, select at Width and Height that is less than 100% (e.g. 95%). If the letter is too small, pick an adjustment that is slightly larger than 100% (e.g. 110%). Make sure to keep the Scale proportionally checkbox checked.

Transform
Keep clicking the Apply button until you get the shape to completely fit within the document.
To center the object within the page, ensure that the object is still selected and then follow Object > Align and Distribute... or press Shift-Ctrl-A. Make sure that you set Relative to: to Page. Click both the Center on vertical axis and Center on horizontal axis buttons.
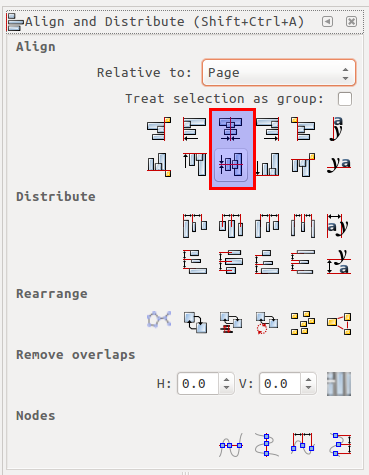
Align
You can now export the file as a PNG (Inkscape's native file format is SVG) by following File > Export PNG Image... or by pressing Ctrl+Shift+E. Enter a filename (the standard is either favicon.png or favicon.ico) and destination directory and make sure the other settings are consistent with the image below and then press Export.
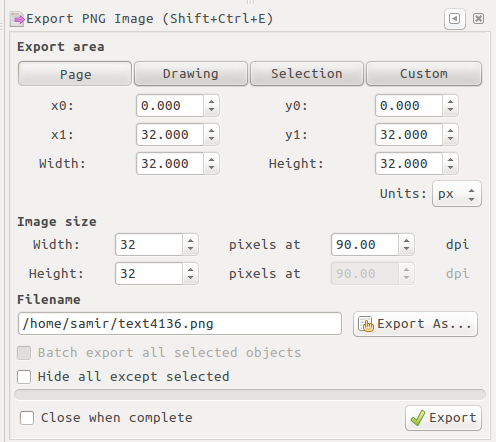
Export PNG
Now that you have the PNG file, you can upload it to your server and then ensure your HTML pages reference it. For my self-hosted and crudely assembled site, this means dropping the file into the /assets directory on my server and updating the <head> tags in my pandoc template to include the line
<link rel="icon" type="image/png" href="/assets/favicon.png" />Note that if you do additional research, you'll find that you can include files that represent other resolutions of your favicon. I haven't done that here but there are plenty of resources on the internet that provide additional information and details on this, some of which are listed below.
Additional References: